 The
Gun Bucket
The
Gun Bucket
British Mk I Male Tank
Building Report
Part 2
Stage 11:
Welcome back to the Rhomboid ! All interior surfaces have beem primed white and have been given a varnish of satin matt (both acrylic).
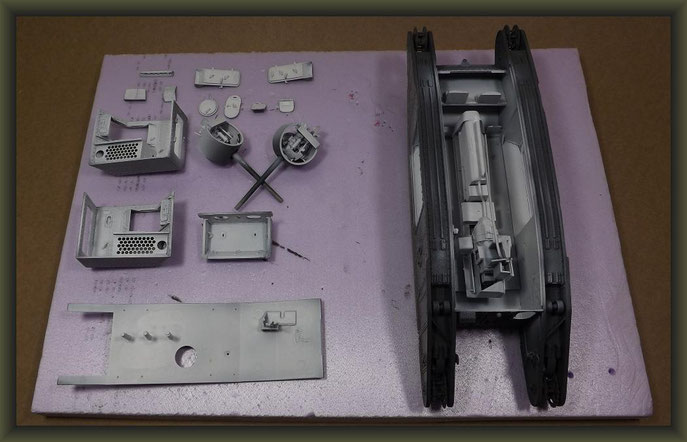
The next batch of photos serve to show the external detailing. From left to right:
- Large hexagonal nuts added to top edges of sponsons
- 8mm rivets added to lower edge of sponsons
- Deleted rivets (red) and replaced nut (blue)
- Note the addition of 3 nuts per fishplate ( 8 pieces ... inside and out) on the lower track rim
- Hydraulik jack and door frame detail
- Front glacis - two rivets removed and replaced by boltheads
- The kit headlamps were thinned down and repositiond (90%)
- The Resicast 3.5mm lenses plus 'electrical' wireing makes this 'in your face' detail more believable


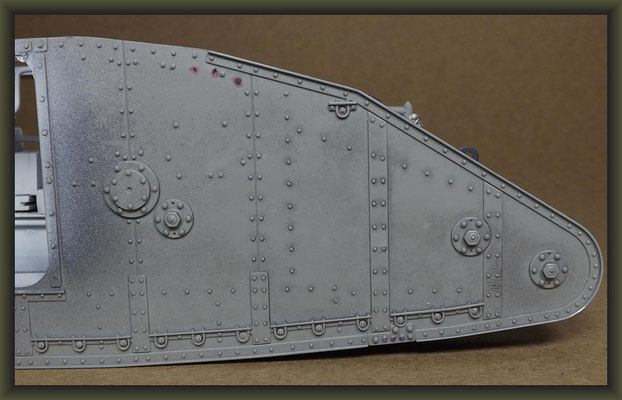


Did someone call a cab ! Well at long last here it is ...
Thank's to RP Toolz the cabin rivets have come out just as I wanted. Unfortunatly, there is still some bickering of just how the spacing of these rivets exactly were. However, after looking into all the pictures I could find and weighing things up, I reckon I'll go with this. I am very much into detailing but sometimes it can get OTT and then you can get ... er ... bigger problems.
BTW, although this looks like a lot of update work on this kits biggest mistake, in actual fact it took only two hours in all, albeit streched out over a period of two weeks.
N.B. As Karl Marks almost said: "Rivet counters of the world unite ... you have nothing to lose but your marbles"!!
So then, I think we'll round this evening off with a coat of Procol Harum acrylic paint (???)
on the figures, prior to painting ...


... a whiter shade of pale.
20.07.'16
Stage 12:

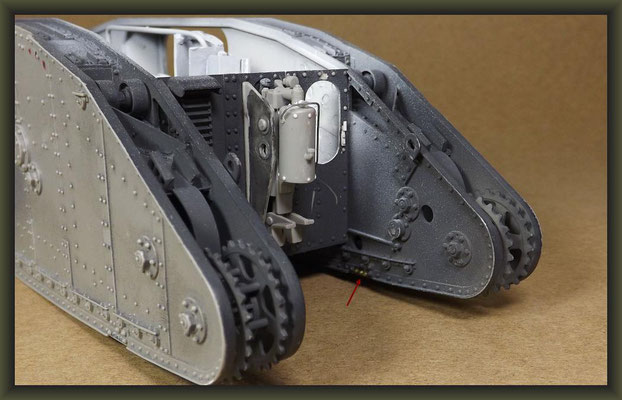
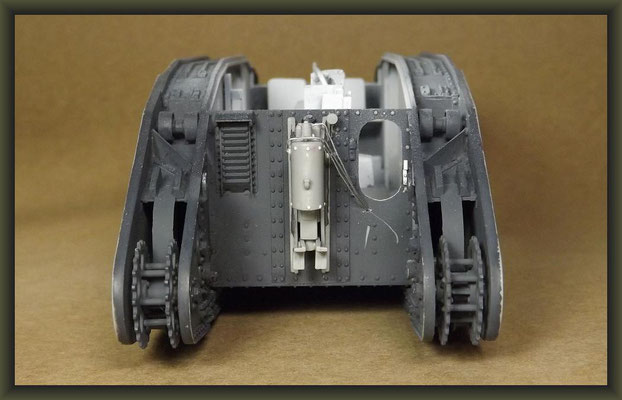
No, not 'The War of the Words' just my attempts to seal the gun sheilds tightly to the sponsons.
Although I think H.G. Wells would be proud of me (and Heath Robinson not a little jealous) !


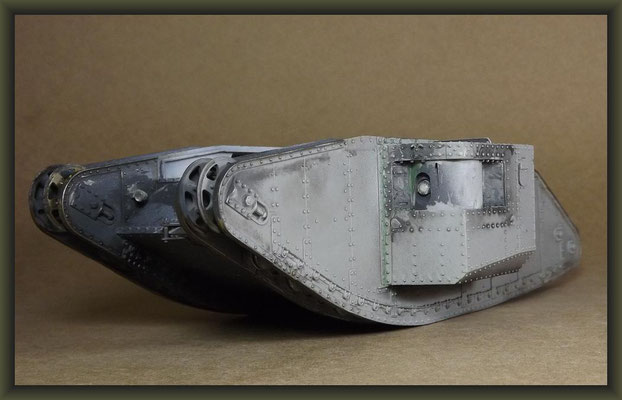


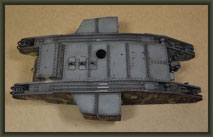
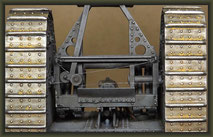
Fighting compartment completed. The sponsons themselves did not fit very well to the side walls. Note the amount of Liquid Green Stuff used to fill the gaps. A coat of black acrylic primer quietend everything down (roof not yet cemented to main body). I've given the tracks a touch of young (yellow) rust and a fine polish, more in accordance to it's pre - debut battle condition.
26.07.'16
Stage 13:
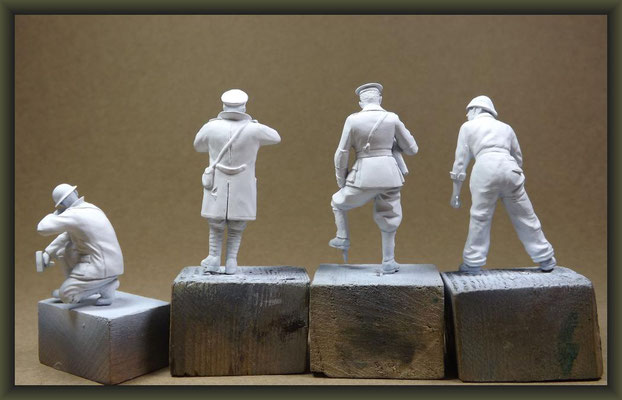
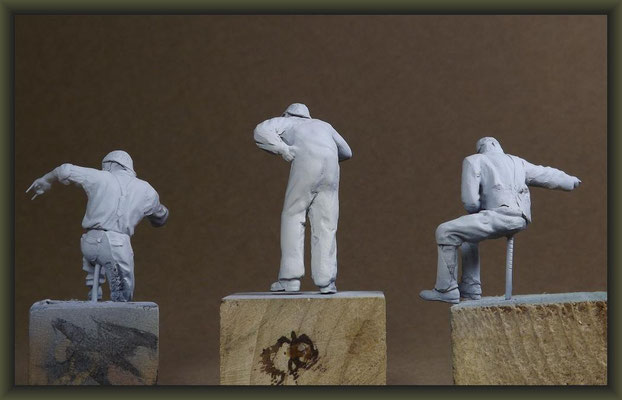
The figures are about 90% finished at the moment. I had a bit of bad luck with the paint as it kicked out too much oil, so I'll just let them dry out a bit longer before their completion.
Stage 13 ... how fitting !


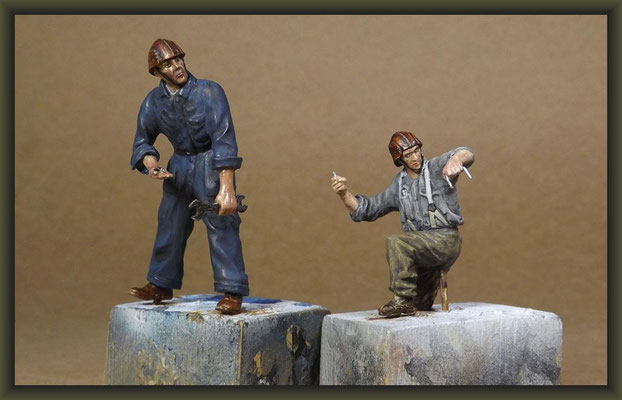

I couldn't resist putting the 'Magnus Opus' in at this stage as it reminded me of 'Mother'... no, not mine the first 'Tank-Mother' of all.
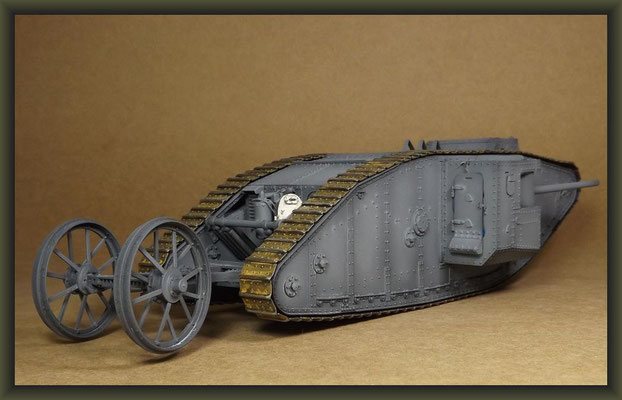
Acrylic base coat applied in a 'cloud pattern' but letting the black primer show through here and there. Just for the record, the prototype shown in the photo's, is constructed using ordinary steel plate (as opposed to face hardend in production).
On close inspection you will notice that the rivets are set at Boiler-Makers Pitch - closer together than my (production) model which has the rivets set at Girder-Makers Pitch ... just thought you'd like to know in case your stumped for a 'chat-up' topic!
Eh-hem ... "We Fade To Gray"....


03.08.'16
Stage 14:
The camouflage painting on these early vehicles requires some research, thought and preparation. Firstly, the idea of 'hiding from the enemy' via this technique was still in it's infancy and this resulted in many 'test' patterns. Secondly, what I'm aiming for here is the original U.K. Horizon pattern, oversprayed by the tank crews themselves in France. Sounds complicated ? Allright then, I'll add to this a four tone pattern with sharp edges and black demarkation lines.
What I also have to bear in mind is that all tones will become considerably darker after the 'washing'.


From L to R. ( all paints acrylic) ...
Horizon pattern. Pinks and golds. Some areas masked off. Uneven light brown spray applied and masked.


Light green coat - masked. Yellow with buff highlights. Remove masking.


Edges lined with black acrylic (note slight enlargement of the rear yellow pattern). Dark brown washing applied and removed gradually (oil paint with turpentine).

The roof and steering assembly also received a dose of the oil mix.
A point to note, the base colour of these 'rhomboids' was Factory Gray and not green as the box art depicts. As the swamp-like conditions of the Western Front negated all attemps at camouflage - all subsequent tanks were painted brown. Up to now I can find no evidence that anywhere painted green, with maybe the exeption of those vehicles, that were used or 'slated' for Russia and museum examples from the '30s.
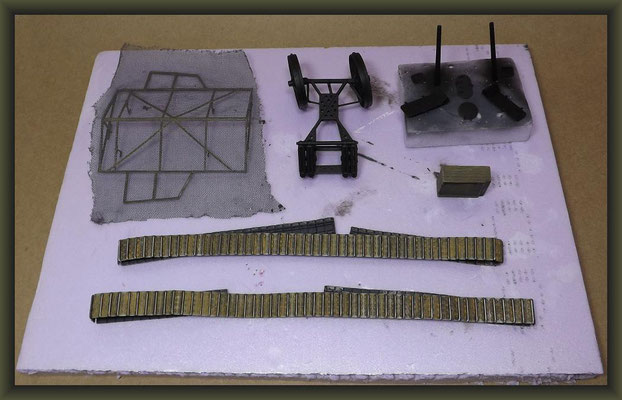
Allthough the underside of the trail will be hardly visible, I could'nt resist adding the steering cables. Apparently these were prone to slip off the pulleys, rendering the whole mechanism
useless. The large angled plate (kit part T21) has been replaced by a shorter piece of photo-etch.
So then, before I 'sling my hook', I'll leave you with a tase of things to come ...

08.08.'16
Stage 15:

No, the chunk of marble is'nt added overhead protection ...
It's just that the grenade roof had a bit of spring to it, so I put some weight on to keep it down.
Mind you, a few of these vehicles did have a form of spaced armour protection bolted to the roofs. It was made out of the same material as the tank itself - face hardend boiler plate.


I thought I'd better mention this, as I had a bit of bother fitting the trail to the main body.
The 'culprits' were the cleats (pts T16 and 17) that I'd already glued to the hydraulic and as a result did not sit flush with the cross beam on the trail. It's only a little thing I know, but to rectify the problem, I had to pull it all out and reset ... t'was not a pretty sight.
So, if your're thinking of having a go at all this, I suggest you remove the pins on the hydraulic system and glue the cleats (they have locating studs) to the cross beam on the trail. Then let things all line up naturally.
You may also experience difficulty in attaching the trail axle stubs into the inner hull sides.
I trimmed both mine down to 1mm so that they'd 'slide' in easier. Remember that this area can require some force to fit together, something that sensitive parts 'go to pieces over', so please take care here. No small wonder then that these actual trails were removed/discontinued following the Somme battles.
09.08.'16
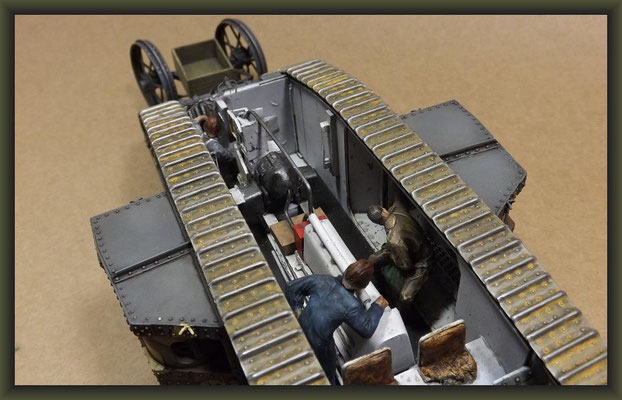
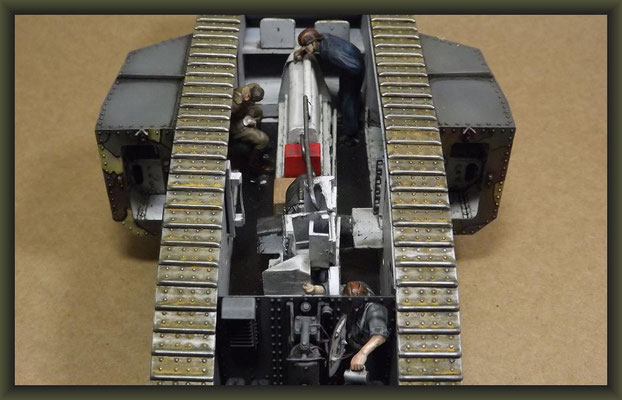
Stage 16:
A last look of the fighting compartment before I close the 'lid'. I'll see you then at the finish
(or start ?) line.


Gerne können Sie mich auch auf deutsch
kontaktieren od. einfach einen entsprechenden Kommentar hinterlassen.
