 The
Gun Bucket
The
Gun Bucket
British Mk I Male Tank
Building Report
Part 1
Stage 1:
This is my first WWI armoured Diorama and my first experience with Takom, so I'm hoping for the best but expecting the worst. What I intend to do is to cross (in the box art sense) both kits ... ... a Mk I 'male' with the steering tail, grenade roof and cam sceme of the 'female' version.
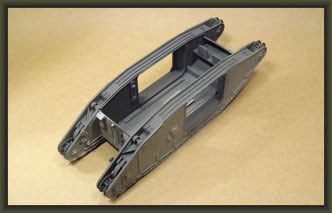
As this is a Diorama and not a solitary model I have to construct it in different steps as printed in the instructions. I have decided to jump the first 5 and start with the hull walls, not only to see how well the parts fit but I have to leave the roof off for internal work and figures. This also will be of greater help if there are any problems with alignment of the main body.
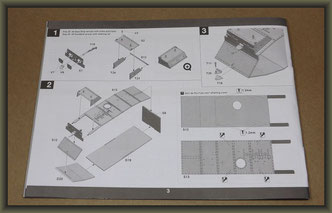


The fit is good with only one small 'glitch' so far, small sink holes in part T3 that are visable through the upper side opening. Rather that 'kit and wait', I made some plates out of sheet plastic and rivets. Speaking of rivets, be aware that they have two heads, so if they are on one side make sure to repeat them on the other. I have left these off for now as they may not be visable from the outside. There is a small gap inside the lower hull wall which I've filled with some plastic, more for stability than accuracy.
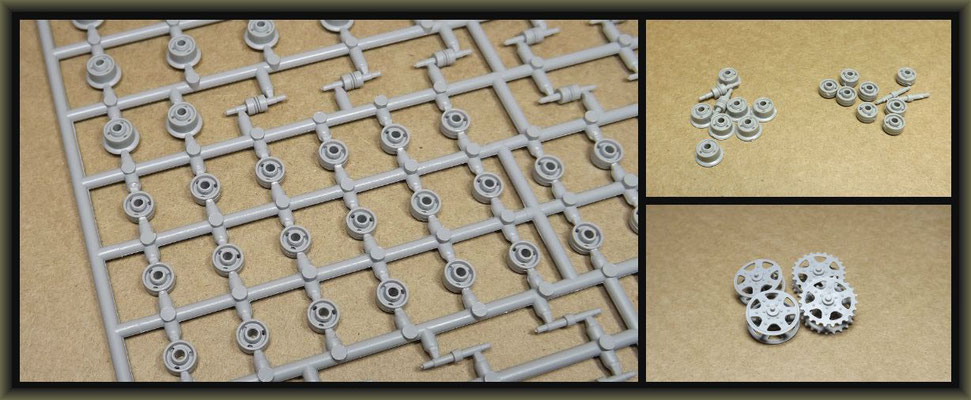


There are 27 wheel 'pairs' (sadly no extras) that have to be 'ripped' out of their spures. Fortunatly as they are not visable they require only rudementry cleaning. The toothed drive sprocket is at the rear, the smooth idler wheel at the front.
BTW ... the idler wheels on the original tanks were also toothed but luckily this detail cannot be seen through the track. The links of which are a snap together affair but do have small pin holes in the outside center. I've filed my down slightly here, I suppose I could put it down to hard
French roads. As I was putting them together, I suddenly noticed small and different numbers (seqence?) on the inside and thought for a fraction of a secand ... OH NO!!

Up pop the rivets again !! Takom have supplied some extra 'little blighters' on their spures, so
check first before throwing them away. This of course goes for all kits - you never know.
A problem I've encountered over the years is that of rivet making ... From:
- metal ones with instant cement (once out of line -allways out of line)
- Resin ones (same problem)
- Chopping off plastic scrap (accuracy depending on your cut)
- Homemade plastic attempts - nothing but stress.
However, recently I came across this . A bit 'salty' but well worth every penny - different sizes and that constantly.


"Oh ******* Dear" - just as I was feeling good about this buying this after-mark kit it all went
'pear-shaped'. The bow may not seem much but as it's high up on the front of the vehicle, it's
gonna stand out like ..er.. 'cannine testicles'. Man, now I've really got the 'hump'- looks like I'll have to 'scratch it' !!


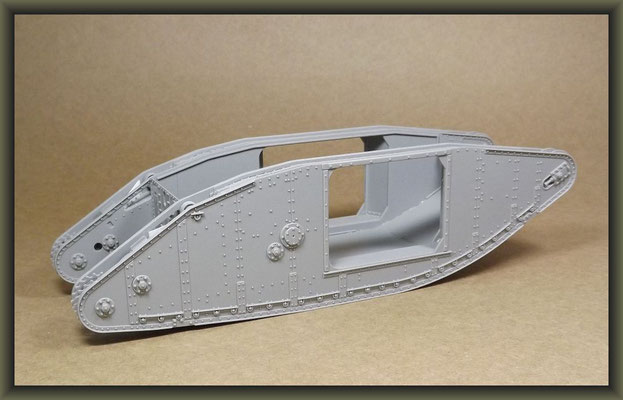
Lets move on a bit. The side walls are in place and straight and the wheels have been roughly cleaned. Looking at these first 'Gun Buckets' one could think that they were in a perfect rhomboid shape, but on closer inspection the lower track run is beveld. On hard ground only five wheels make contact. This was so that the tank could turn easier and quicker.


Back to Takoms notorious cupola. I've 'bitten the bullet' and have had a first bash at it. I reckon a piece of 1.5 mm plastic sheet either side of the outer walls and an extension of the angle irons should do it. As I want both vision ports open, there was no option but to scratch them and chop off the outer plates from the original.
I sometimes make notes on the instruction sheets of my models for future use. So, as I've been going over all the details I have to add to this not so cheap kit I've had a thought. Being as Takom & Co have had their fun with me, I think I'll have a laugh back ... Takom first:

CAUTION:
- I have and I wish I did'nt.
- A supervising child should be present if an adult assembles the model.
- When assembling this kit, tools including knives used ? ...(probably won't make much difference).
- Extra care should be taken to avoid personal injury ( well Takom, improve your kits and it may never happen).
- Keep out of reach of small children (Takoms already let theirs at it and look what's happend).
- Children must not be allowed to suck any part ... (the kit does that on it's own).
- ... or pull vinyl bag over their heads (allthough you may well be pulling one over your own head before your finished).

04.06.2016
Stage 2:
Enter the Hulk !! The main body went together without hitches but I did use the roof as a sort of template just in case anything was out. I would have liked to have left the rear door open but what with all the other correction work I'll leave it, maybe next time. I guess it was too much hassle ... (for me and Takom).


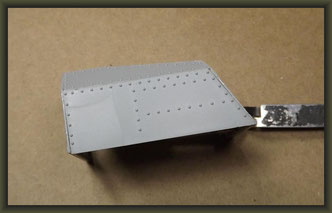
Right-ho then ... the the infamous cabin roof. I've started by removing some rivets and detail then filled up the inside of the front, side and rear plates (remove tab in red circle).


I guess casting the steering unit in two parts was the easy option for Takom. The resulting gap did'nt 'seam' to bother them ...
06.06.'16
Stage 3:

Here we go again ... Steering frame cleaned up, but I think I'll give it another going over just to be on the safe side.
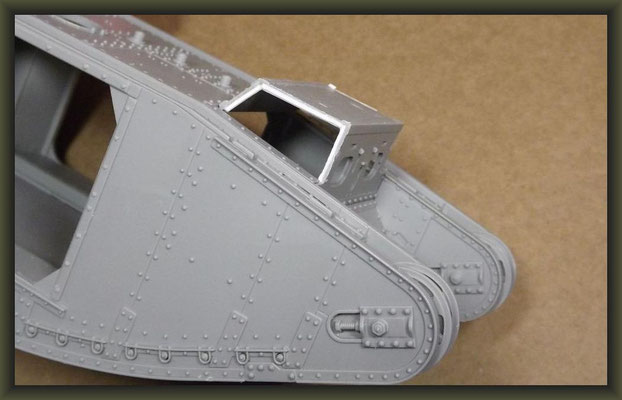


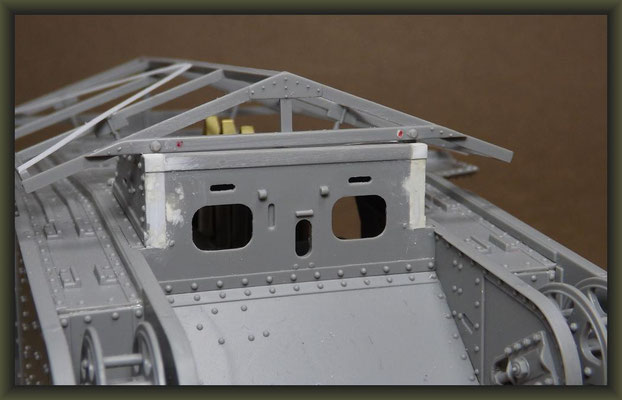
Cab roof brought into line. I've cut a strip off the lower side (ca 1mm) so that they sit flush.
The lower lip of the front plate has been reduced to avoid a gap between the top of the glasis.


As I have no drawings as to the cab width, I decided to gradually build up the thickness using the tracks as a guide. The cabin width is now at 41:2mm (plate to plate-not rivet to rivet), with a slight gap between the tracks. Notice the thinned down plate around the visors.

Sponsons-note overlap of plate. Roof being used as template.

I followed the kit instructions to fit the gun mount but winded up way off the mark. Ripping it all out I started anew. Remove detail in circle and upper tab from head plate.


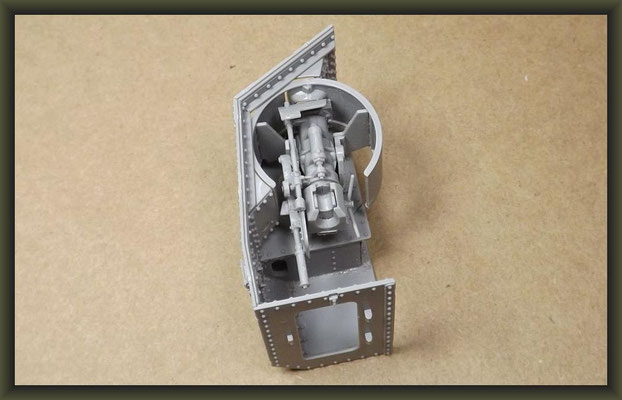
Deepen grove (or remove some of the etch) in top plate. Fit mount making sure that it all sits forward and high up against the sponson walls. Fit header plate last. Thin down the pin on the gun platform so that the breech wont sit too tight. Notice thinned down door ways. Basically, you want your gun shields to fit ...


something like this ...
... as opposed to something like that.

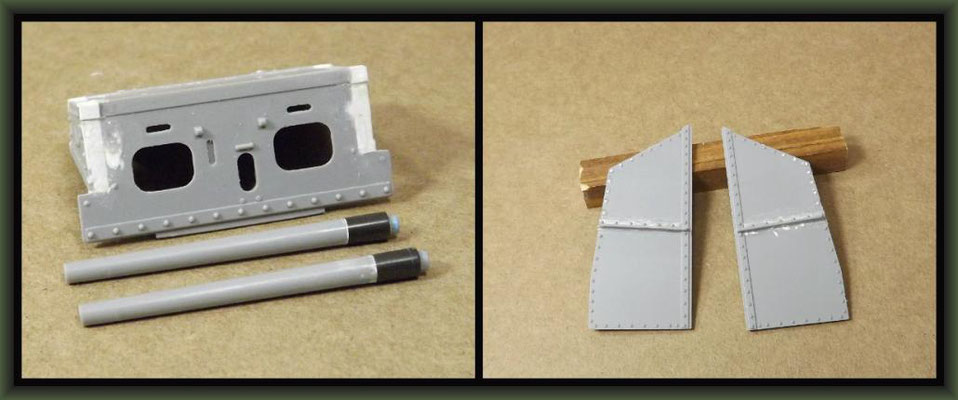
If you like surprises and challenges, this kit is for you. Gun barrels 6mm too short - they need a bit more cleaning-up, but for now ...''Thats all Folks''.
09.06.'16
Stage 4:
I think it's about time for some interior decorating!
One thing I've learnt about this 'art' is to have good detail just inside the openings, but not to go overboard the deeper you move into the fighting compartment. Logically all this depends on the model and what you want to be seen but generally I would (as here) go for a good sillouette.
It may seem a waste of time, as very little of the work can be seen at the end of the day, but you never know what the eye might pick out via other openings (light sources). Speaking of sources, for this build I've been relying heavily on this little book from 2004

Only 45 pages but packed with clear and concise info and many photo's for model building.
It also has a couple of chapters about the lesser known Mks II and III. Highly recommended !!
Why Takom did'nt take a glance at this first is a puzzle to me ... Anyhow, for other references
I have been visiting the sites of: The Great War Forum and of course: Landships.
The internals require a little more 'donkey work' on them first and then I'll make a start on the steering tail.


12.06.'16
Stage 5:

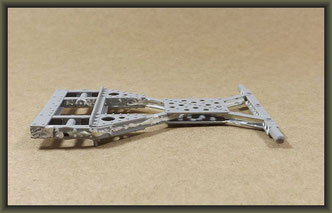
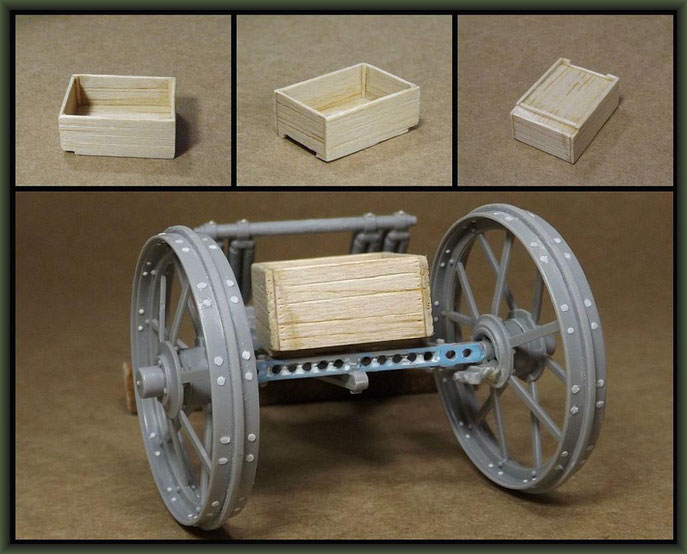
First-up tonight - the tail ... As I wanted to show this with the wheels slightly turned, I had to cut apart the solid steering arms (under the frame) and reassemble them using metal pins as hinges. I also considered scratch building all 8 springs with soft metal wire, but maybe in another ...er... life. There are some who maintain that the wheels have no outer flat rivet heads and are clear holes ... but I am not convinced. There's still the wooden box and pully cables to come as well as kitting, but that's enough on this for now.


I've given the interiors and gun barrels a last 'going over', the drivers cabin, alas, is going to take a bit longer. One point I'd like to mention here is the sponson roofs. Takom have the angle irons at 90°, but on closer inspection they are slightly... well... angled. These pair I've cut off and reset. I dunno about you, but you remember that closed oval hatch at the rear of the tank. Ah ... never mind, just me wondering.
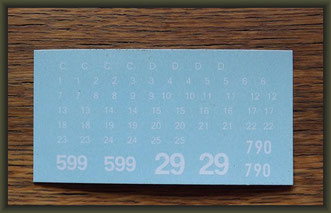

Black Lion Decals ... arrived today! These should give me more 'range' when I select a definitive
vehicle.

The remains of the day. This is the stuff left in the box, which could come in very handy for a MK2 Tank with track extensions/open chain drive mechanism. For me, right here and now, it's just spares-box fodder.
Being as you've been so good, I've accelerated this build up to a full 2 mph!! - so you can get
a first glimpse of the beast in his basic form ( provisionally ). So, Ta -Ta and all the best from the 'G-force-like' speed of WW1 armour.


14.06.'16
Stage 6:
Here's a few more things that I've noticed on the race track ...


The hydraulic jacks on some of the early models were not fitted with shields, a bit of filling and rivet making and we're almost there. I've made some notes on the this and the tail, nothing special just some 'nit-picking'. The anti-grenade roof was fitted to some but not all of the Somme tanks. They were also of different configurations. Some were the basic Takom offering but most seemed to have them extended over the sponsons (as here). A few also had an additional screen over the back, turning the thing into a sort of violent high-speed chicken coop. Speaking of such ... the mesh (going by a close up pic) belonged to the same construction. I reckon a piece of old-fashiond curtain net should give it that certain 'Formula 1 cool look'.
Yes, I'd knew you'd agree ...
15.06.'16
Stage 7:
I think we'll start with the grenade roof ... A slight correction over the sponsons followed by the reduction and repositioning of the cab roof cleats (note bolt heads). Hydraulik jack prepaired for fitting. Inside of sponson(s) complete. The gunners arm rest/gun traverse has been set in the upright (travel) position (note loop hole handles).


More loop hole and rivet detail on inside of sponson doors and roof hatch. Be aware dear reader, that I'm working from old pictures and so this only MY interpritation of the Mk I inner hatch details. If there is anyone out there with proof for/against this configuration, please let me know.
Mind you, I don't think I'm far off the mark with the cabin visor flaps.
Looking like something out of 'Paint your Wagon' ... the tail storage box (note studs on top of rear spring crossbar). I'll 'hit the trail' now and if you fancy, we'll meet back here in the 'break-neck' world of 'figure-bashing'.
19.06.'16
Stage 8:
Before the 'figure bashing', I'd like to give the sponson doors a reapearance. I was'nt too happy with the first result so I thought I'd clean up my act a little. For the non-rivet fanatics ... the improved versions are on the right.

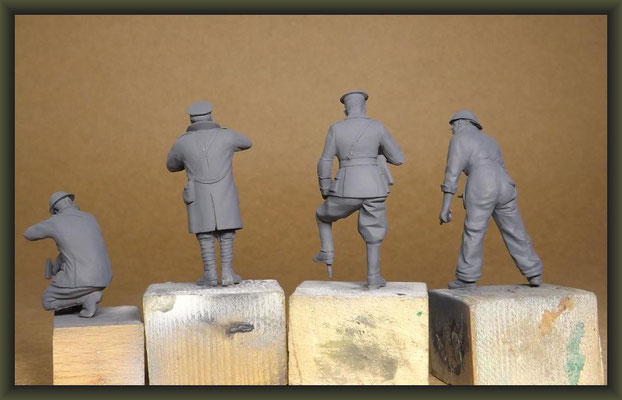
Using diverse figures I steadily built up the first staging. A great deal of maintenance went into these first 'monsters' (again not unlike the kit), so I decided on a working senario. However, my first attempt pulled the attention away from the tank and toward the group. The single figure on the otherside was a little too far away from the model (solitary figures attract more attention).


To be honest with you all, allthough It looks easy - this for me is the most difficult part of any Diorama. I want to display the 'Male' as a ship and by that, I mean with the bows clear and with an art 'wake' to the sides and rear. With the second staging I pulled the figures in and changed the walking fig to a kneeling (eavesdropping) one. Maybe the latter will move towards the rear in due course as the pose is fairly neutral and small. For now though ... that's about the size of it!!


That closed back door would'nt leave me alone ...

Thus I took to meat cleaver and BFI (Brute Force and Ignorance). For those who are thinking about doing the same with this kit, I strongly advise you to do this particular correction BEFORE you cement the back plate in. The 'fella' pouring , who knows what out of the back, looks quite relaxed ... in contrast to his 'maker' after fitting him in.
So, i'll leave you with the usuall 'boy-group' before collecting my 20 kilo packet of Milliput.


23.06.'16
Stage 9:
Not too much to write home about at the moment, ( in the wake of Brexit who would want to ... ) so just a few pics of my 'Gullivers Travels'. I reckon another week and I'll have the 'little fellas' ready for painting.


30.06.'16
Stage 10:
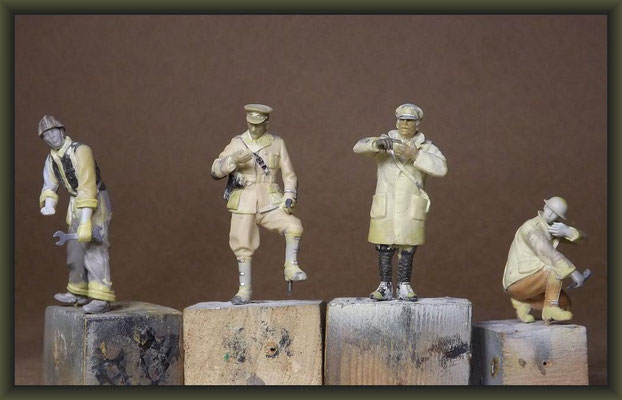
Back on the figure front. I thought it better to give you a before and after display so you can get a better idea of the work involved. We'll start with the three 'internals'... I've only paid attention to those areas that I myself can see through the hatches, so no big deal about these.


A bit more in-line are the 'externals'. Grey acrilic paint was air-brushed on to highlight any
mistakes, and although there are a few 'gliches' that need correcting here and there, I'm quite happy with them at the moment.


The same process was carried out on the model. The grey also acting as a base coat for the fighting compartment. Note spare track sections, primed for test painting/surface treatment.

15.07.'16


Gerne können Sie mich auch auf deutsch
kontaktieren od. einfach einen entsprechenden Kommentar hinterlassen.
