 The
Gun Bucket
The
Gun Bucket
M7B1 105mm Howitzer Motor Carriage 'Priest'
Diorama 1:35 / Building Report
Part 2
Stage 5:
Stop Press!!
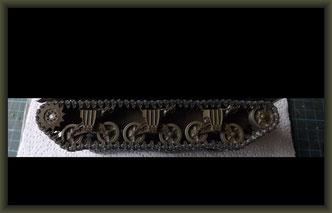
I'd like to thank two of my fellow enthusiasts on this forum for reminding me, that Sherman tracks sit a lot tighter than on my model. There is also an ongoing debate about the different number of links concerning the factory fresh Sherman/Lee and M7 family.
After counting the links from various manuals and books, I tend to agree with one of my 'inmates' that the M7's had 78 links per side.
"So what" ... I hear you cry. "So, back to work" I answer:
b c q f x v


Ha-Ha-Ha-Ha ….

25.07.'17
Stage 5:
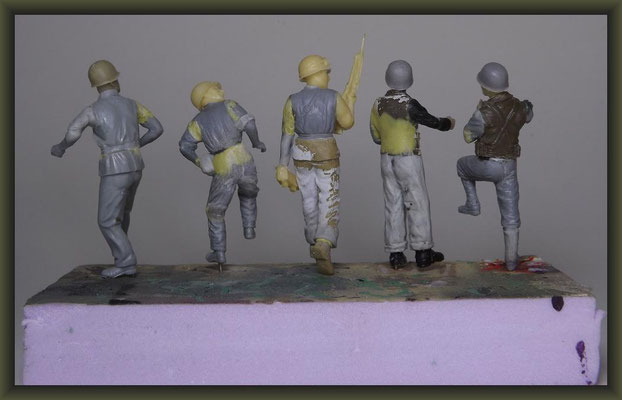
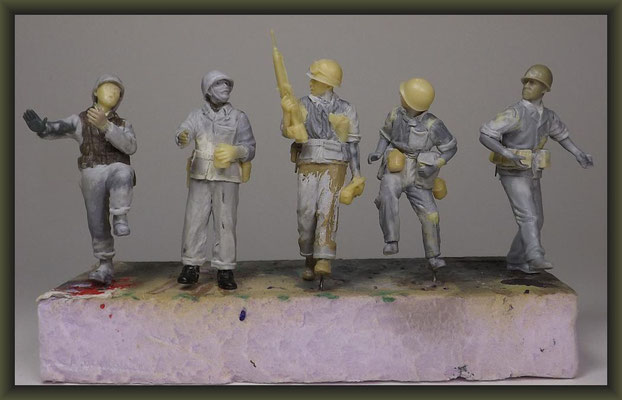
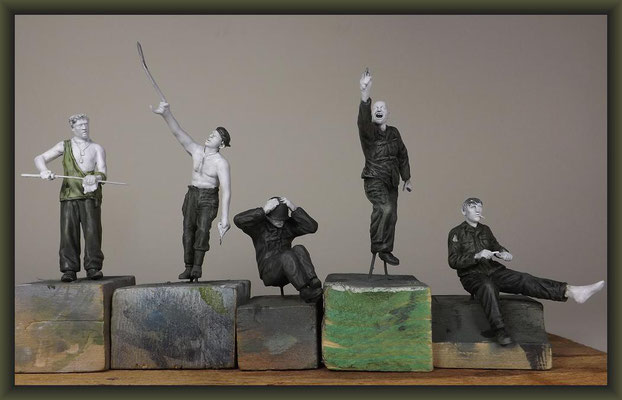
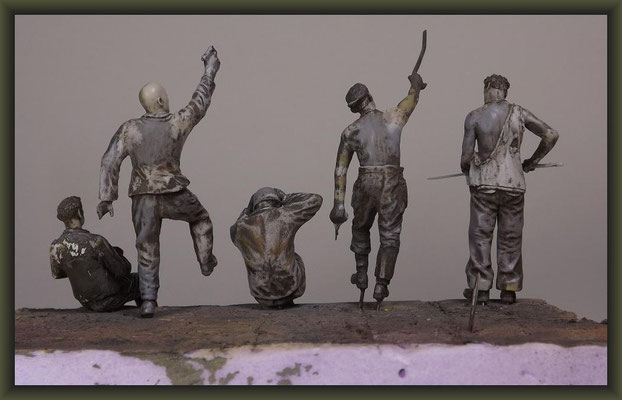
The figures have taken on a bit more putty. Some have been altered and some require more work than others … but I'm getting there quietly.


On the other hand, the 'bible puncher' is up and running. Alow me to 'preach' a little before we walk around ...
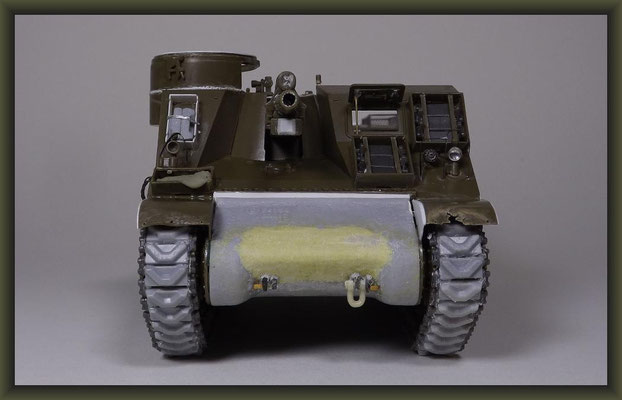
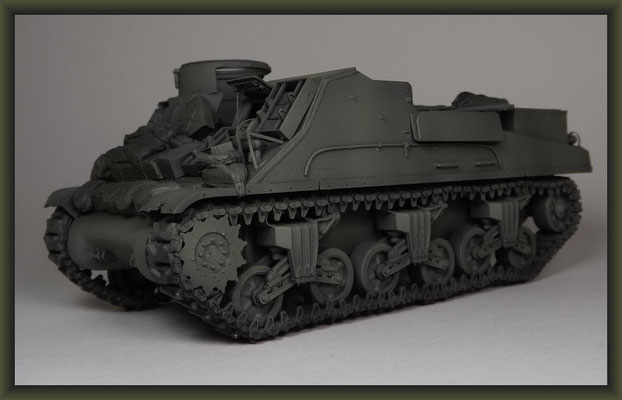
Head on: Transmission housing upgraded to the sharp-nose version. The metal boxes on the upper hull have spare tracks rather than the normal track grousers as added protection.
The front may seem a little vacant but there's more 'beefing up' to come. Note splinter damage to port fender.
The sides: No appliqué armour. This is because my model depicts a U.S. Army AFV who, unlike the Marine Corps, did not plaster the sides of their combat vehicles with track lengths/planks etc.
On most pictures of Pacific war armour, the later stamped wheels are seen as opposed to the early open spoked variety. This is because the Jap's started to shove iron bars though the latter in order to immobilise the tank. The insides of the wheels I have left hollow, as this area will not be seen on the diorama.
The side pannels have been corrected as they angle upward slightly because of the step handles and rear folding arms. All vents have been removed on the tool boxes (late M7's only) and in line with U.S. practice, no radio is fitted.
The rear: Minus the shovel, it sports a myrad of tools and the fenders have finally found the right form. The splinter damage on the front port fender is 'faithfully' reproduced into the track itself.
As previously stated, the engine deck is to be covered with a tarpaulin.


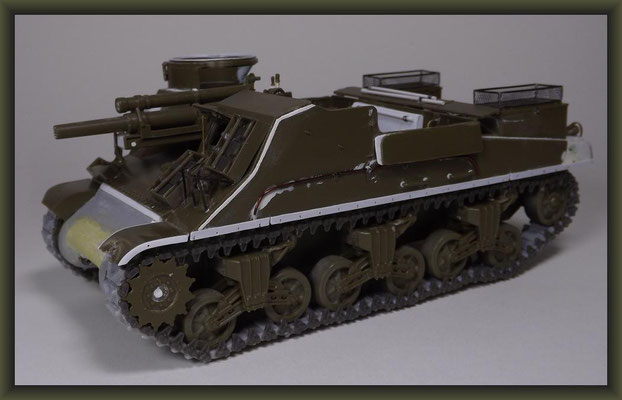
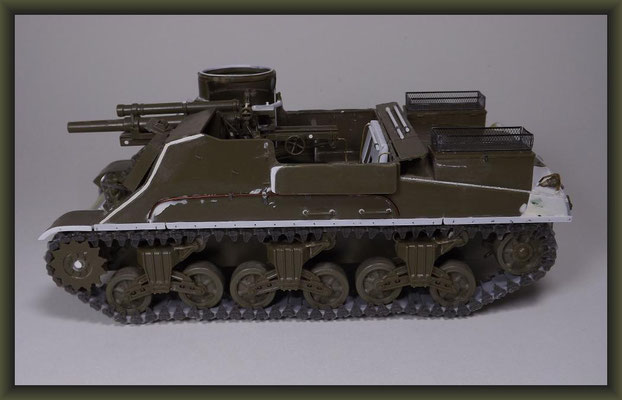


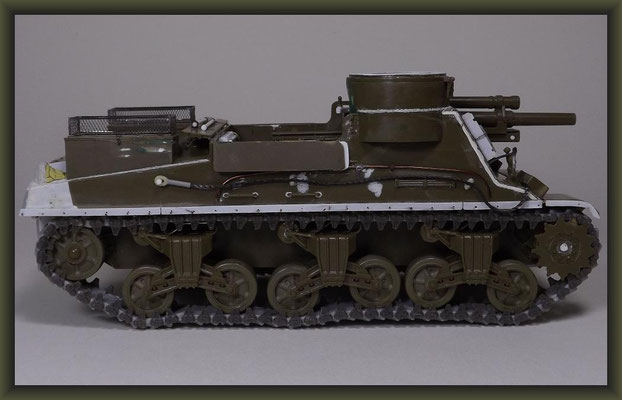

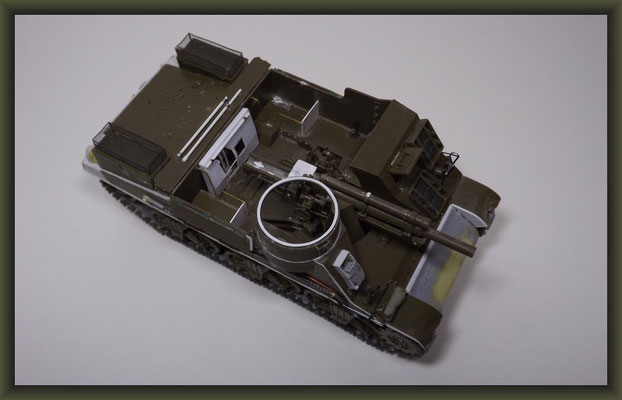

The .50 cal M.G. is ominous by it's absence as it was very rarely seen on vehicles in the Pacific.
The reason being, that it was Jap (suicidal) practice to overrun an AFV en masse as a last gasp AT method. Successful or not, the .50 could be used by them on other U.S. troops.
Which brings us to the first staging:


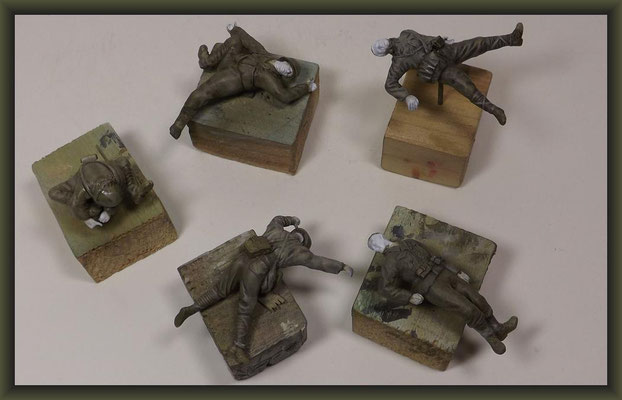
My Dio depicts such a scene post combat. The Marines to the rescue! Not quite … this Army crew have taken care of things themselves.
That's the problem with 'Priests' … 'For every good there's a bit of bad …

29.07.'17
Stage 6:
Nothing much up this week, just some more work on the figures ...


03.08.'17
Stage: 7
My introduction to "The Gun Bucket“ bears the sentence: 'Welcome to the weird and wonderful world of Military Scale Modelling'. Only, what makes it so ?
'We are not governed by words but by symbols' (the Analects) ... and as I think about my hobby, it's surprising how often the Ying and Yang symbol turns up – every body contains a little of it's opposite.
Civilian figure and landscape Diorama's are generally a pleasant affair depicting mankind in the norm. Conflicts cast a shadow on that landscape – 'War is the blight of mankind'.
So why go for the dark side?
Well, I see it more like: 'The darker the night the brighter the candle'. Even a flower will stand out in the midst of a Military Diorama. Things are never one side only and warfare - per se - is both, natural and unatural (think about what blight really is).
When working on my Dio's, I divide all elements into two halves. These are the mechanical and the natural. The former being vehicles, weapons boxes etc. The latter, all things that are formable and have a 'sit' to them ... figures, clothing, tarps etc.
For the sake of an argument and for clarity let's call them the static and the flexible.
Basically, I view an AFV as static and the groundwork/figures as flexibles (a tank must be pressed into a soft groundwork). That's the basic rule but the 'weird and wonderful world' starts, when these things become contradictory, complimentary and 'morph' into each other.
Place a truck on a level grass base: The truck is static and the groundwork flexible.
Truck on level tarmac: Both static.
Truck filled with ammo boxes on tarmac: All elements static apart from the suspension, which has 'magically' become flexible (you have to alter it to suggest weight).
Same truck with tarp and figures loading ammo: Here we're about 50-50.
As above but on a slight gradient, in a field on an autumn day, in the middle of an an argument: I'd say 5/6 ths flexible – a Ying and Yang effect has been achived.
There is life and movement (in contrast to the model) which enhances the realism of the vehicle, everything has a tale to tell.
Even if we swing the pendulum in the opposite direction, we can achive the same effect.
Picture a workshop with a huge AFV (tank or maybe a mini sub) with a small apprentice (maybe brushing up) gazing up at the coloss. That one figure is your human contact/bridge to the scene.
One or two static figures dislocated from the vehicle (doing nothing) on a plain base, will present the viewer with 'a model' with no meaning or reason for it's existence. Additional static elements will only serve to distract and dilute the effect, becoming ALL onesided.
Some even go to great lengths, to fully computerise their groundwork around their models. Taking this lazy way out, only serves to add more static (unnatural) elements to a machine.
As far as I'm concerned these things are dead in the water.
I'm no expert or artist but I have been in 'this game' for quite a few years now and my basic philosophy is, that all projects should be a challenge and none should be easy. Learn from your mistakes and admit to them. 'On the other hand' ... relax and enjoy. That's what hobby's are for. You will never make a perfect model or Diorama … if you did so, then you would be God and if you started saying that, well … ;-)
Right, enough theory onto the practice:
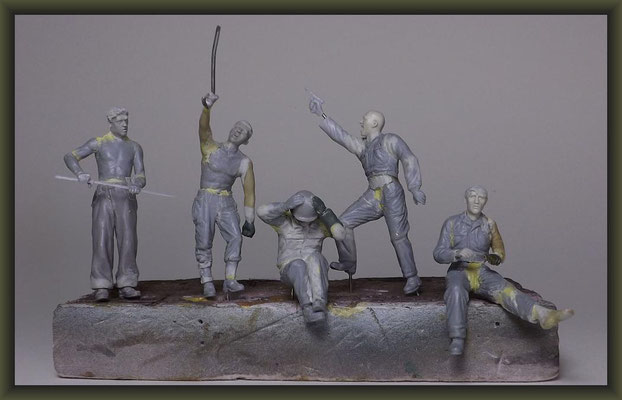
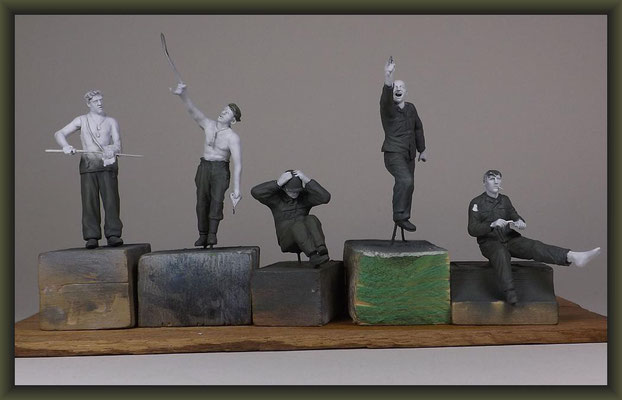
Here we have a myrad of 'static's' and 'flexibles', which I shall leave up to you to put in order.
But be carefull ... because things here are not all as clear cut as they seem to be …
Aye, even Gun Buckets have their dark sides.


07.08.'17
Stage 8:
How summer holidays fly ... ah well, back to the workbench.
We'll start anew with the base. The centerpiece being the floor of an Okinawan hut. These houses are somewhat reminiscent of Cousin IT out of the Addams Family.


The figures are now ready for completion. I won't bore you with: „Oh look, I've painted his hat“ commentry, so no more on these until the finished dio. Suffice to say, that I'll just be using my old technique of oil and turps on them.


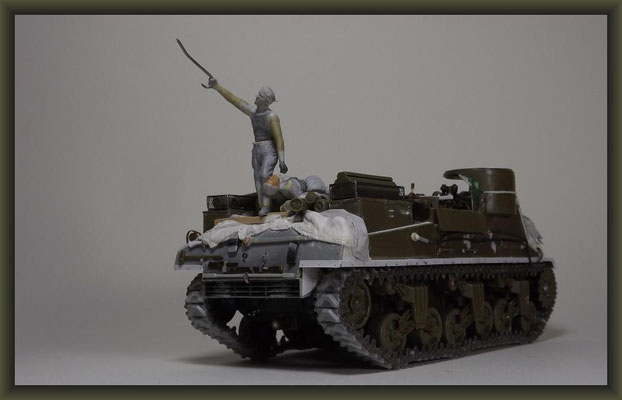
I've also skipped a couple of moves on the 'cannon'. The 'holy man' has received a coat of acrylic black and has been airbrushed with hair spray fluid. This may seem strange but decantering the stuff into an airbrush before applying it, does give a more subtle coat for the later scratch technique. A layer of olive drab lightened up with olive drab & white/yellow in cloud burst fashion gives the first impression of depth.
I always mix my own (lighter) tones for base coats. Exact paint chip and RAL numbers don't count in my world as all these change (become darker) with washings etc.


I'll sign off by giving this 'Heaven Caller' a few scars …


25.08.'17
Stage 9:
Leaving the gun and the blanket baskets off, gives me more room to manouver, painting the sandbags etc.


Once dry, the usual dark brown oil wash is applied and dabbed off. Logic rules that you should leave off the small and sensitive stuff beforehand.
Alas, sometimes this is not always possible and so some small parts may break off during the dabbing process. My attitude to these little disasters is to expect and accept them. A good tip is to work over an old light coloured T-shirt or a box, then if the bits choose to go ballistic, you stand a better chance of collecting them.


I'll tell ya, this job is "cracking" me up!!

08.09.'17
Stage 10:
We all have our Demons ... and this is mine:
A Minicraft 1:144 Ki-44 Shoki.

... one flew east, one flew west,
One flew over the ...
18.09.'17
M7B1 105mm H.M.C. 'Priest' / Gallery & Building Report: Part 1


Gerne können Sie mich auch auf deutsch
kontaktieren od. einfach einen entsprechenden Kommentar hinterlassen.
