 The
Gun Bucket
The
Gun Bucket

Normandy Coast 07:00 hrs. 6/6/44
Omaha Beach. Easy Red Sector.
"… the nearest run thing you ever saw in you life ..."
Arthur Wellesley
Tragedies rarely have one reason for happening. Be the causes human, mechanical or forces of nature. The wrong place the wrong time, missed detail – a wrong move.
Six miles wide and 500 yds deep at low tide with a sea wall halfway up. The sand turning into shingle at the base of imposing 150ft high bluffs on which sat a concrete incased enemy.
Boasting more A.T. guns, obstacles and mines per sq mile for it's defence than all her neighbors, Omaha was by far the biggest and toughest of the D-Day beaches.
Pre-bombardements were ineffective – overshot by the USAAF and too short a duration by the USN. The appalling loss in Duplex-Drive tanks, a fast rising tide and the 'missed' artillery of the German 352nd Infantrie Regiment all served to orchestrate the worst killing zone of Operation Overlord.
With casualties mounting the attack stalled and came within a hair's breath of being called off.
Hardest hit were the men in the first waves - soldiers of the 1st and 29th Inf Div's along with the Ranger Groups … "the men nobody envied".
Of these waves, the joint army-navy engineers of the Gap Assault Teams came off the worst. Charged with clearing mines and obstacles for incoming landing craft and armour, their casualty list touched almost 50% with some teams being wiped out to a man.
However, every storm has an eye and this particular 'ogre's peeper' lay in the middle of the Eastern half of Omaha – the sector of Easy Red. Wedged between the thick brows of the Colleville and St Laurent draws, the defences in this area were not as strongly manned. It was here that the first breakthroughs occured and where the G.A.T. units, despite severe losses,were most successful. Four gaps were made which later accommodated the bulk of the ensuing waves.
The concrete, steel and weaponry of the Atlantikwall was a tough nut to crack ... thank God the kids of the great depression were tougher.
The Diorama:
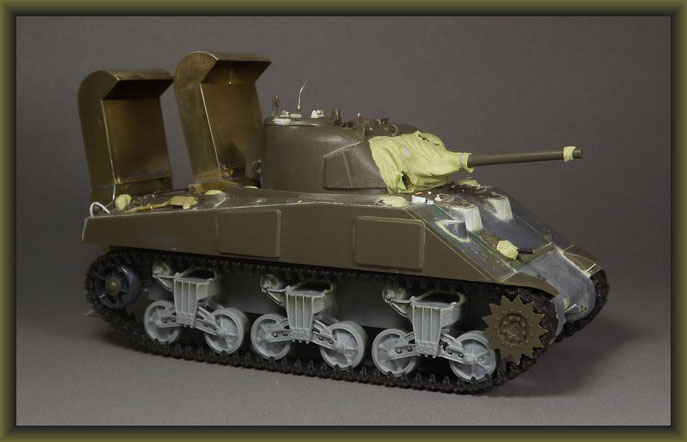
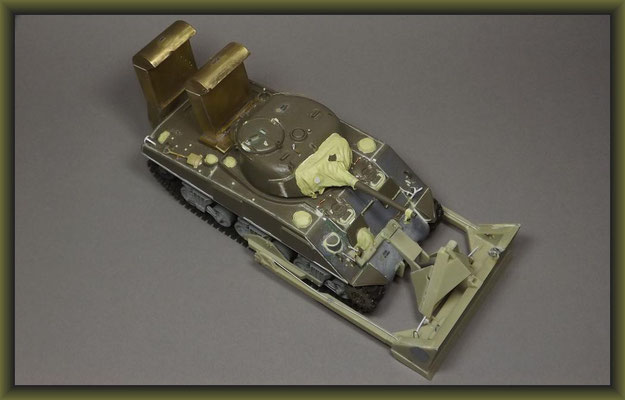
For my final chronological work, I've chosen a Sherman Dozer tank with Deep Wading Kit belonging to 'A' Coy, 741st Tank Battalion. These were temporarily attached to the G.A.T.'s
(one per team) for the 'break-in'. Numbering 1 to 16 (running from West to East) they are easily recognised by their M1 Dozer and large G.A.T. numbers on their rear exhaust stacks.
As my research went, I'm happy that all these vehicles were M4's during the inital phase.
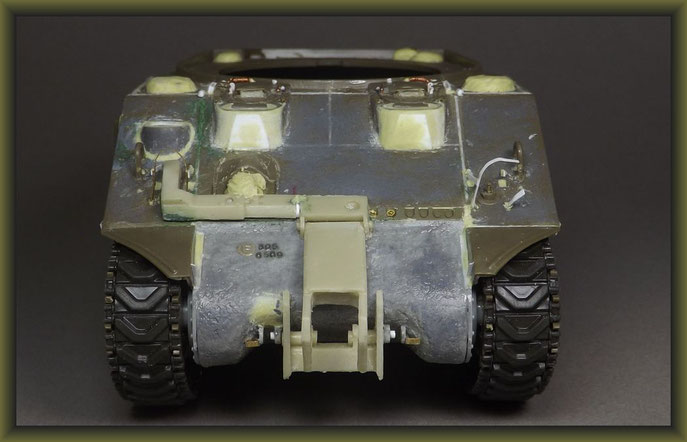
The other deep wading Shermans of the 741 and 743(Omaha West) Tank Battalions were M1A1's and with few instances M4's. These towed M8 armoured ammo trailers and had NO dozer attachments fitted. They were NOT attached to the G.A.T. units and therefore bore NO such numbers on their rear stacks. All these tanks were transported/ launched (H-Hour 06:30) in three's from an L.C.T. One dozer at the rear and two M1A1 (or M4's) raised in front upon firing platforms. The latter tanks therefore having no gun muzzle seals. Drivers hoods (in most cases) were covered and sealed with Bostik paste. I have not attached any release cables to my Deep Wading Kit as these numbers were meant to be seen and not dropped in the sand.
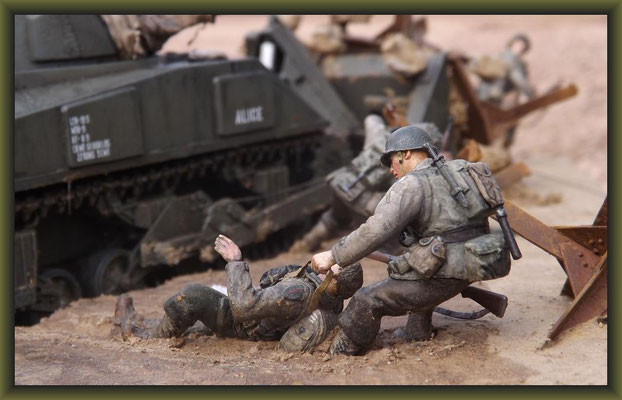
After reading about a coastguardsman who volunteered to lay a telephone cable only to be killed in the attempt, I thought I'd put one on the dio to give him a chance - so to speak- of surviving.
The strange scenario of infantrymen huddling behind the dubious cover of steel 'hedgehogs', which their sappers were trying to demolish. Heavy weapons being carried clear of the surf only to be dumped on the shoreline. The soldier who laughed all morning after seeing his Sgt throw a seasick buddy over the side of a landing craft. G.A.T. engineers standing acrobat -like on each others shoulders to remove mines atop wooden stakes. Tanks shuffling about - becoming sitting ducks for German gunners, returning fire in a life or death Punch and Judy match.
Taking in all these events, Omaha took on a deadly but slightly surreal atmosphere for me.
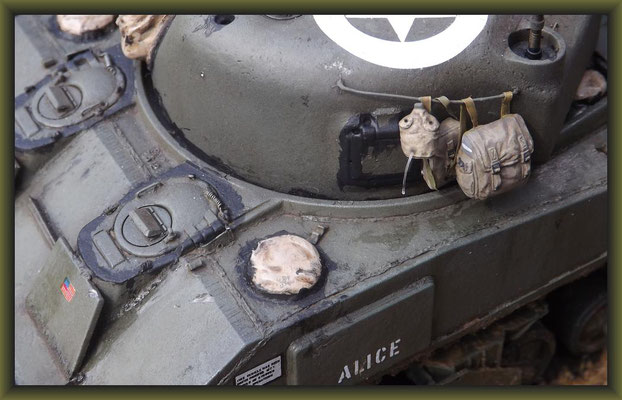
Lewis Carrol's Alice in Wonderland came to mind, which was a bit of a coincidence, as
A Company's tanks used (for the most part) female names.
As for the latter, well … It was a WONDER that anything did get to LAND let alone get off the beach. One by one the tanks came to grief. The 741st lost 50 Shermans, dusk saw only 3 left in action. I suspect that Nr 14 was one of them.


Here's some of my online research I'd like to share with you:
This one's a Dutch site (partially in English) of the first wave at Omaha. Photo's from Cappa and Sargent. Note how the Czech hedgehogs lie in irregular scattered
belts at different distances at and from the shoreline:
https://www.strijdbewijs.nl/robert/capa1a.htm
https://www.strijdbewijs.nl/omaha/sargent3.htm
A mammoth of a work. Landing Tables for Omaha:
http://ww2talk.com/index.php?threads/omaha-beach.69555/
A report on the actions of U.S. forces on D-Day:
https://history.army.mil/books/wwii/100-11/ch3.htm
N.C.D.U.'s:
http://www.6thbeachbattalion.org/dday-gap-assault.html
A 'lost' photo?
http://www.ww2incolor.com/us-army/American+infantry+struggle+ashore+on+Omaha+Beach.html
Obstacle clearance (note the dangers of "blowing 'hedgehogs' to smithereens" under ENCLOSURE):
https://www.ibiblio.org/hyperwar/USN/rep/Normandy/CTF-122-NCDU.html
Some 'hedgehogs'. note different concrete ancorage:
http://www.stolly.org.uk/ETO/czechhedgehogbeachobstaclespileduponutahbeach.html
For those who want to learn how to Xmas decorate an M1 Dozer … you won't find it here.
(note elongated drivers periscopes – not always fitted):
http://www.theshermantank.com/tag/dozer-works-with-vvss-and-hvss/
The same page but with an example of just what a real-life 'ALICE' is capable of.
https://drive.google.com/file/d/0B5k30qNybbcZbm1HLTkwU1FUOWs/view
Before I take my shore leave, I'd like to dedicate my initial landing series to the men of D-Day.
Especially to those who never lived to see their victory.
The Day of Days was made with great sacrifice and therefore it is important to remember what these men fought and died for. Because of them and many others of their generation we have enjoyed peace in Europe. 74yrs ... and still counting.
"... the nearest run thing you ever saw in your life ..."
Whatever the causes of the high price of freedom – will, fate, error, courage or the ebb and flow of lady luck … you'll find them all on and around the beaches of D-Day. Particularly, at a time and a place where her young life's force was spilt in waves.
In the cold wet morning light of the 6/6/44 ... on the sands of Bloody Omaha.
Completed: 06.06.'19
M4 Sherman Dozer w. Deep Wading Kit
Diorama 1:35 / Building Report:
Oh-Ma-God, it's the last of the chronological initial landing series ...

... I think you can guess on which beach we'll find ourselves.
Stage 1:
With the tide coming in ever faster on my appointment with D-Day, I've been forced to make a move - and rapid.
We'll start with this old crustacean:

As I've said before, I'm not a fan of closed vehicles. On the other hand if there ever was a reason to show a Sherman fully "buttoned up" then this is the beach to put it on.
The upper hull is built OOB with the periscopes open. The lower hull is from Dragon, no real reason for this, exept that I had one on the shelf and it looked to be slightly more akin to the A.F.V. that I had in mind.


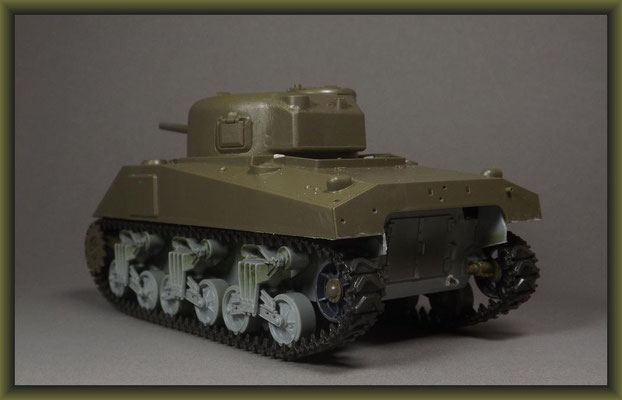


So then, all sweet and innocent up to now.
But be warned, there's no time to "hunker down" and take a breather, ... 'cos dis lil gal' … is going to turn into a bit of a bruiser ...
14.04.'19
Stage 2:
Cleaning up Tamiya's M4 front hull is a bit tedious as it is more in line with an M4A4 version.
After rounding off the drivers hoods, I've extended them with plastic sheet before final forming.
Weld seams have been filled in and raised along the upper body where nessesary. The lower radio pod as well as the build up of the small attatchments were a bit of a job as the Sherman was built by many different manufactures. Each having their own ideas about the diverse details.
The one that caught my eye is a so called Alki Sherman. This has it's own batch of peculiar fittings as you will see as we go along.
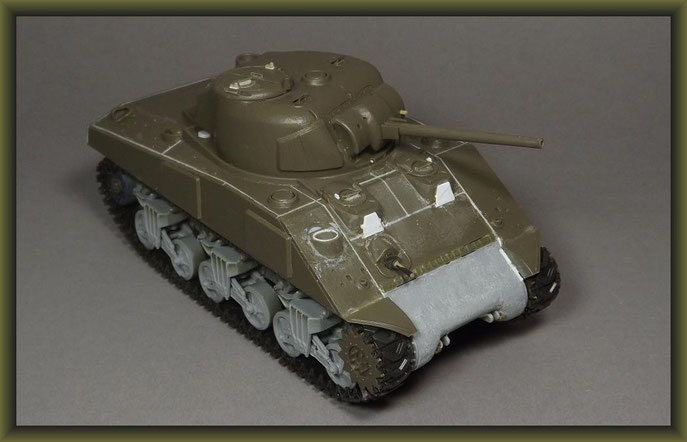
... 'ang on, I meant an ALCO Sherman (American Locomotive Co) and not ALKI … maybe that's where the term "Shermaholic" comes from 😉
16.04.'19
Stage 3:
This next set of pictures may seem to be a bit of an eyesore but I have to get this stage 'out of the way' as it were, before the next step.


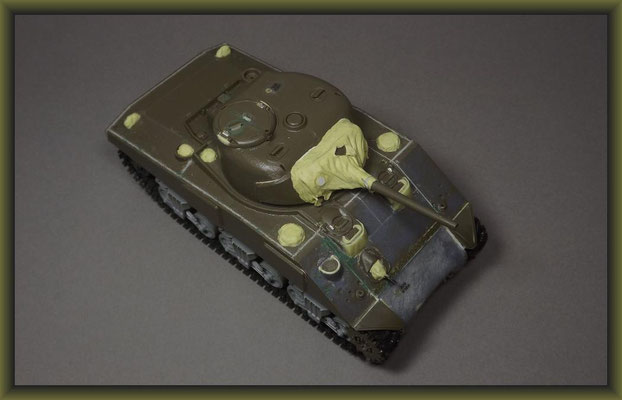


Tamiya's incorrect drivers hoods are in the process of being reformed. More trusty milliput has covered the various air vents and M34A1 gun mantlet.
Just for the record (I still can't quite believe it myself) … this is my very first M4 Sherman.
Ah well, never too late to learn.
21.04.'19
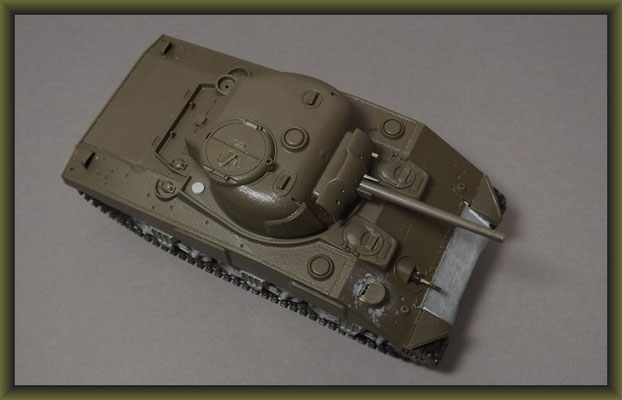
Stage 4:
Time for a stroll around the "wonderland" of Sherman details.
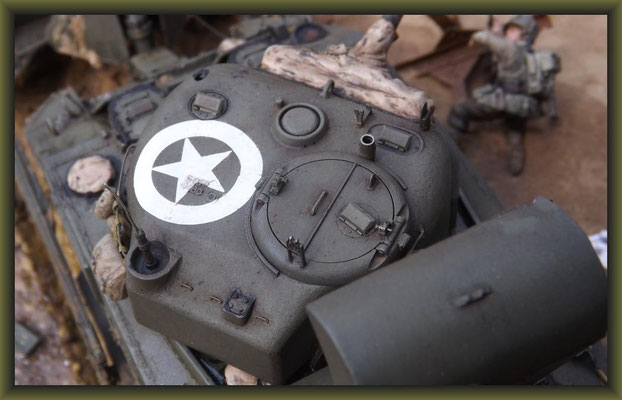
Some ALCO versions have bullet guards around the drivers hatches. I could'nt resist having a bash at them here. The "hoods" are coming along nicely but I'm not aiming for 100% as they will be partially covered by applique armour plates.
I guess every modeller has his own "must detail" somewhere or other. With me it's the commanders fixed vane sight. I've had to scratch this one as I've run out of PE/resin parts. Another "must" is the commanders hatch "clips" on early/mid types. You can usually bluff them when open as they become partially hidden but when they're closed they're "inyaface".
The rest I'll leave up to you.


At this point I would like to send a heart felt Thank's to all at The Shadock website.
Without whose help I would definitely have found myself "up the spout".
28.04.'19
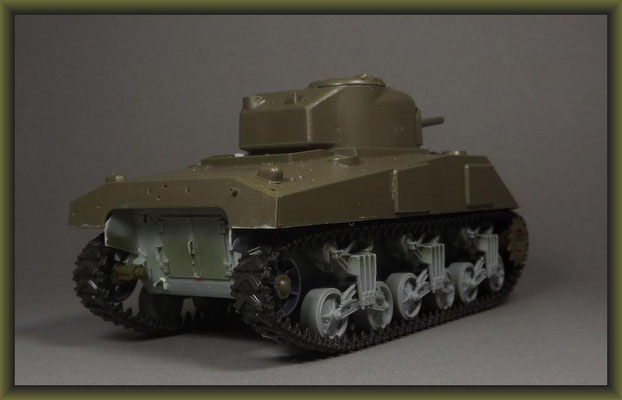
Stage 5:
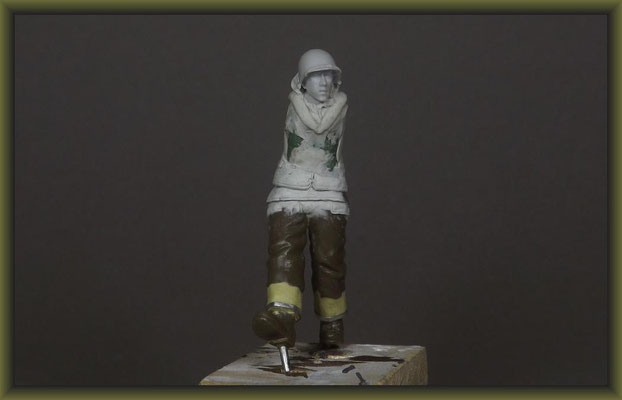
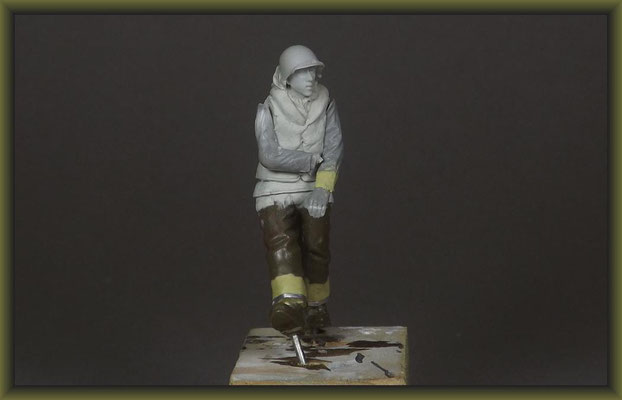
Drying out from all things Sherman this week. It's time for the "little peoples"...
Here's the raw material:
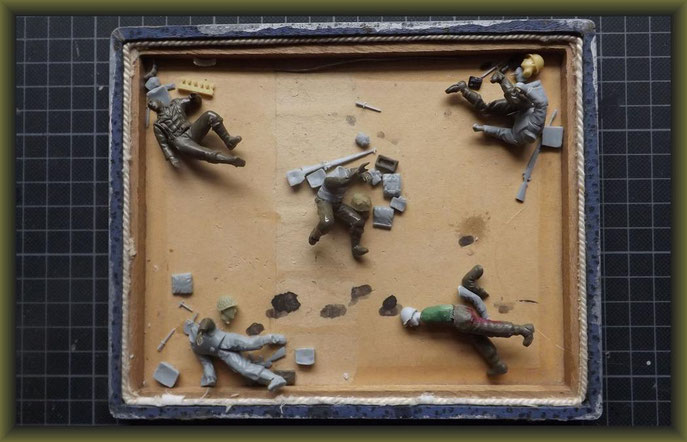
… a mix of this:

… and ancient Tamia U.S. G.I.'s.
"Off with their heads":

"Back on yer 'eads":


Apropos old Tamiya …

… these particular steel girder barriers did exist but they are more at home on the Eastern Front.
For the Normandy Czech hedgehog connoisseur there are a few photo-etch kits on offer, but I've opted for this:

The good thing that I can say about Miniart is that they have a lot of interesting stuff for the diorama builder. Another plus is, if you're a passionate fanatic about cleaning and aligning parts then this is the firm for you. Everyone else is in for a hike.
This is one of my good ones:
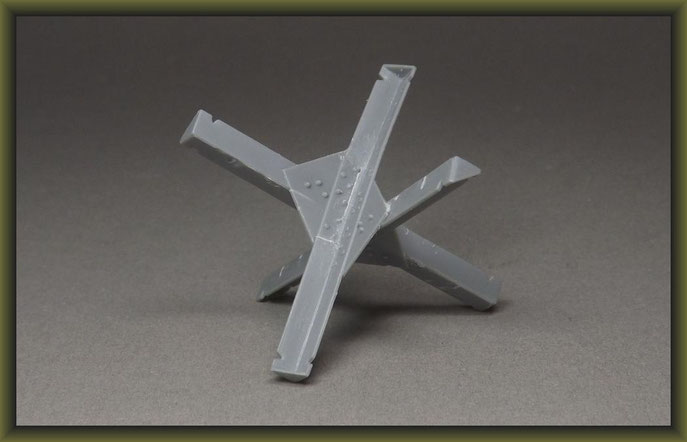
Take a gypsy's warning – they're a right bugger to club together. Best dry-fit first to see how far you want to go with them. If you decide to go bareheaded with the plastic glue (like me), get lots of small clamps at the ready. Then, when all is dry, turn the dremel to high and grind/weld the gaps on the little sods together.
If you read a little between the lines, I think you can fathom out exactly how this particular mini build of 12 units went.
One last word to the DT "Shermaholics" out there: "Calm down, stop shaking, drink tea and tune in next week for a bevvy full of your favorite details." Don't "fret" ... there'll be "stacks" of 'em.
02.05.'19
Stage 6:
It's very easy to get "brassed off" with photo etch parts. They are, so to say, the nerve endings of modelling world. Weight for weight they're more expensive than gold and from fret to finish, they have a tendancy to break/disappear. To add to this, some parts can be worse than the bit it was meant to replace and on times the sheet settlement is the wrong way around.
Why bother then? Well, with a little experience they can really give your model a sharper edge in more ways than one.
I usually start by assessing the fret online and deciding if it's worth the price. Thinking about what I can and cannot use, bearing in mind future projects. Bending the parts prior to their removal from the fret can help. Cutting them out and developing them further upon a sheet of light adhesive paper reduces the well known and stomach-turning "ping".
A bending jig is perhaps an asset … but I wouldn't know as I've never owned one.
A toothpick with some Blue-Tack glued to the end is a great "pick-up" when dealing with small parts. Contact gel is a must as the normal stuff just dribbles everywhere.
One last word on small parts, if you do lose one to the "carpet gnome" don't react to him and start searching for it on your hands and knees. Move on to something else and ignore him. Don't worry, sooner or later he'll drop the thing where it will find you.
Grin like a Cheshire cat if you like but it works for me.
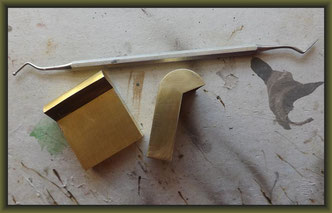
On to something bigger ... as promised ... Stacks!

The instructions advise us to use contact-glue, but here I'm going for soldering as I need a stronger bond. Small iron with dimmer (ca 300-380°), flux and some ABER 0.25 solder. You'll also need a damp sponge to clean the tip of the iron now and again. If your new to all this, find some PE scrap to practice on first.
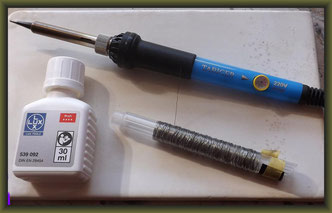
Coat the edges with flux, then line one side with solder. Hold the two parts together, corner to corner apply the heat and let the solder run down of it's own accord. You may prefer to hold a drop of solder on the point of the iron and push it along or push the stuff along with the iron behind it. Some "cool-ones" place the solder in the groove and heat the metal - a process called sweat soldering. Whatever way works for you is o.k. with me. Don't be wary - it's easier than it looks.
Oh, by-the-way, don't forget to use tweesers if you have to actually hold the components … contrary to the verbal reaction, a burnt "pinkie" is nothing to shout about.
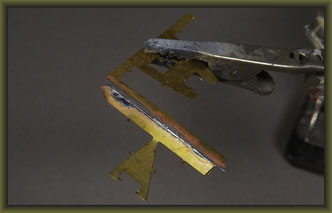
The curve has been formed over a pipe and the mesh removed as I could find no evidence of Deep Wading Shermans with them on D-Day. Later stacks are pictured with a central baffle plate, but again, I could find none present on Op Overlord U.S. Shermans.
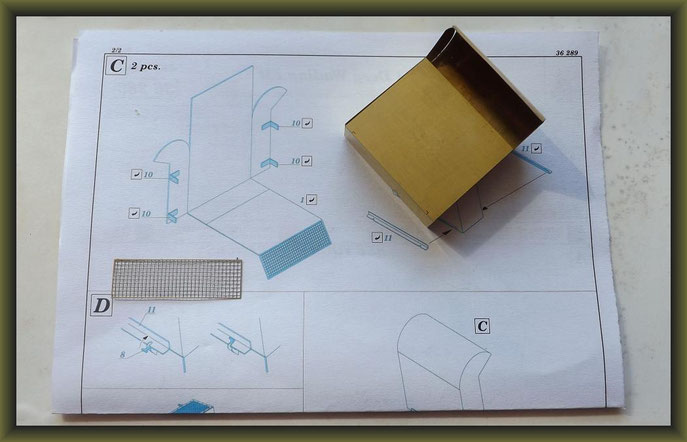
Here I've opted for a slightly more cautious technique than the above mentioned.The sides have been "tacked" first to make sure nothing moves out of line. A curved instrument is on hand at this stage to push the plate back into form from the inside, if a correction has to be made.
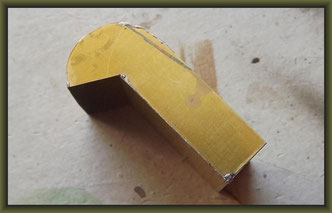
After checking that all is as it should be, soldering can then commence. Apply flux and solder in short runs between your tacks, leaving them last after the main body is secure. When cleaning up (less solder - less grinding) beware of the pressure of your hand on the work - even the strongest of seams will not withstand the pressure of a stressed modelmakers manic claw.
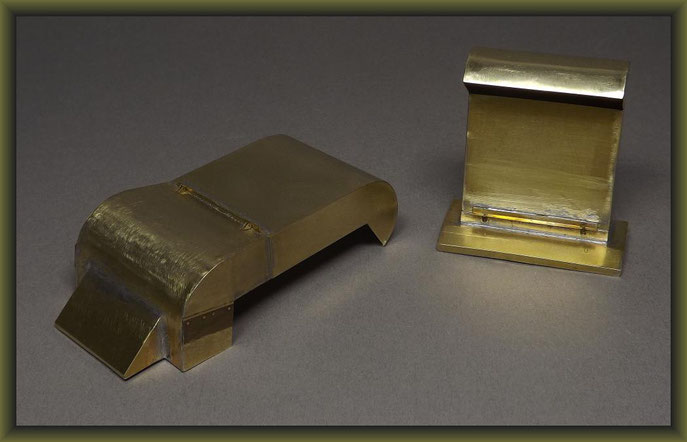
There are additional small details like weld seams, frames and cable eyelets not to mention battle damage that can be added to these stacks …
… on the other hand - you'd have to be as "mad as a hatter" to do all that stuff.
12.05.'19
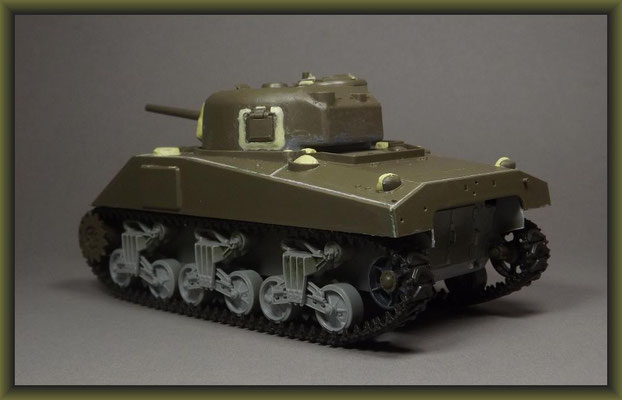
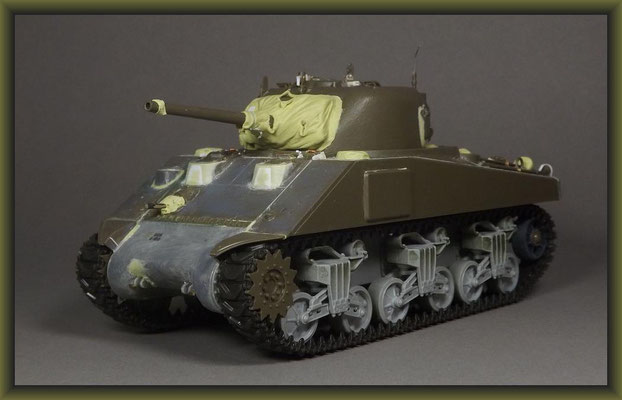
Stage 7:
"I'm late, I'm late, for a very important date"
The White Rabbit
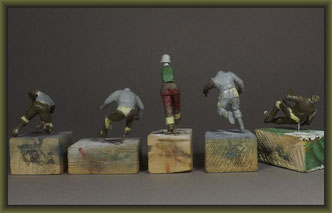
For the figures ...


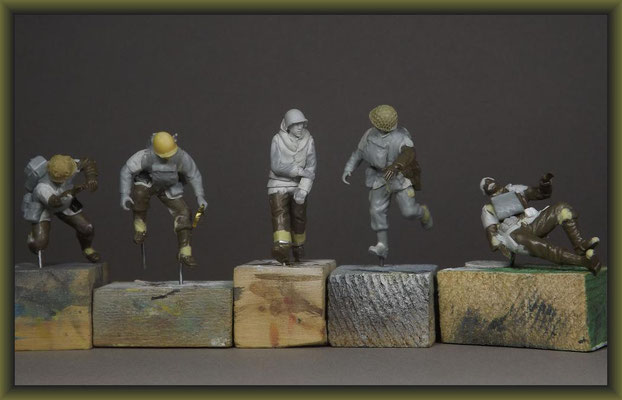

... it's "prime time".
While their drying, I'll 'push on' with this:

The only glitch with this kit is that the sides of the spade need a little filling. Otherwise it all went together like a dream.


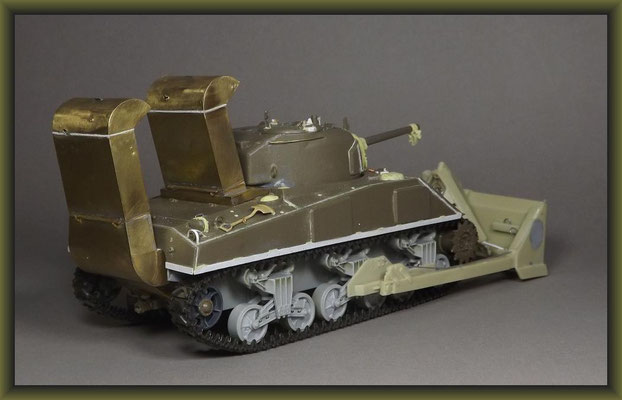


I've added some battle damage plus the jetterson cables along the top face of the vertical suspension mounting brackets. These are sometimes removed, going by wartime pictures.
The lower pipe guard is a little on the chunky side but I chose not to update this. You'll find out why when the … eh … young lady sings.
Here's a close-up of the completed drivers hoods ...
... not perfect but close enough for jazz. The applique armour will hide a multitude of sins.
So then, that's it from me.
I'll see you at completion, in the early morning light … of the Day of Days.
18.05.'19


Gerne können Sie mich auch auf deutsch
kontaktieren od. einfach einen entsprechenden Kommentar hinterlassen.
